


Are you tired of the same old kids’ clothing options? Looking for creative ways to refresh your child’s wardrobe?
DIY kids’ clothing ideas are the perfect solution for you. Not only are they fun and budget-friendly, but they also allow you to add a personal touch to your child’s outfits. Imagine transforming plain T-shirts into unique masterpieces or turning old jeans into stylish shorts.
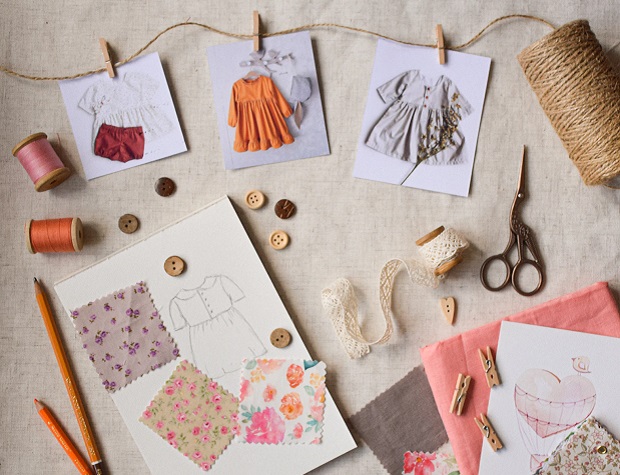
With a bit of creativity and some basic sewing skills, you can create custom pieces that reflect your child’s personality. This blog post will inspire you with a range of DIY clothing ideas that are simple to make and perfect for any skill level. Get ready to explore these exciting ideas and start crafting your way to a more personalized and stylish wardrobe for your little ones!
Credit: amumreviews.co.uk
Introduction To Diy Kids Clothing
Creating clothes for your kids can be a fun and rewarding activity. DIY kids clothing allows you to make unique pieces that suit your child’s style. It also provides an opportunity to bond with your child. Plus, you can save money by using materials you already have at home.
Benefits Of Diy Clothing
There are many benefits to making your own kids’ clothes:
- Cost-effective: Save money by using leftover fabrics.
- Custom fit: Tailor clothes to fit your child perfectly.
- Unique designs: Create one-of-a-kind pieces.
- Eco-friendly: Reduce waste by repurposing old materials.
Choosing The Right Materials
Picking the right materials is crucial for DIY kids clothing:
| Material | Benefits |
|---|---|
| Cotton | Soft, breathable, and easy to sew |
| Fleece | Warm, durable, and great for winter clothes |
| Denim | Strong, stylish, and versatile |
| Jersey | Stretchy, comfortable, and perfect for active kids |
Consider your child’s comfort and the season when choosing materials. Use soft fabrics for younger children to avoid irritation. Mix and match different fabrics for a fun, unique look.

Credit: www.craft-e-corner.com
Easy T-shirt Transformations
Transforming old T-shirts into stylish new outfits can be a fun and cost-effective way to refresh your child’s wardrobe. With just a bit of creativity and some basic supplies, you can create unique clothing pieces that your kids will love. Let’s dive into some easy T-shirt transformations that you can try at home.
No-sew T-shirt Projects
No-sew projects are perfect for those who don’t have sewing skills or equipment. Here are a few ideas:
- Fringe T-Shirt: Cut the bottom of the T-shirt into strips to create a fringe look. This adds a fun, playful touch.
- Side-Tie T-Shirt: Cut slits along the sides of the T-shirt and tie them into knots. This gives a trendy, fitted appearance.
- Graphic Cut-Outs: Use fabric scissors to cut out shapes or patterns on the T-shirt. Layer it over another shirt for a cool effect.
Tie-dye Techniques
Tie-dyeing is a classic way to transform plain T-shirts into colorful, eye-catching pieces. Here are some popular techniques:
- Spiral Tie-Dye: Twist the T-shirt from the center, then apply different dye colors in sections.
- Shibori Tie-Dye: Fold the T-shirt in various ways and bind it with rubber bands before dyeing. This creates unique patterns.
- Ombre Tie-Dye: Dip the T-shirt in dye gradually, creating a gradient effect from light to dark.
These easy T-shirt transformations can turn old clothes into new favorites. Plus, your kids will enjoy wearing something made just for them.
Customizing Jeans And Pants
Jeans and pants are a staple in any child’s wardrobe. Customizing them can make them unique and fun. This DIY project allows for creativity and personal expression. It’s a great way to give old jeans a fresh look.
Adding Patches And Embellishments
One way to customize jeans and pants is by adding patches and embellishments. These can be found in craft stores or online. Choose patches that reflect your child’s interests. Think about animals, flowers, or favorite characters.
- Iron-on patches: These are easy to apply. Simply place them on the fabric and iron them on.
- Sew-on patches: These require a bit of sewing. They are more durable and can be more securely attached.
- Embellishments: Add beads, buttons, or sequins for extra flair. Use fabric glue or a needle and thread to attach them.
Get creative with the placement. Try putting patches on the knees, pockets, or even the back of the pants. This adds a touch of personality to any pair of jeans.
Creating Distressed Looks
Distressed jeans are trendy and easy to create at home. All you need are some basic tools and a bit of patience.
- Gather materials: You’ll need a pair of jeans, sandpaper, a razor blade, and a pair of scissors.
- Choose areas to distress: Common spots include the knees, thighs, and pockets.
- Use sandpaper: Rub the sandpaper on the chosen areas to thin the fabric. This gives a worn look.
- Make small cuts: Use the razor blade to create small cuts in the fabric. Be careful not to cut too much.
- Fray the edges: Use the scissors to fray the edges of the cuts. Pull at the threads to give a more natural look.
Distressing jeans can be a fun project for both you and your child. They can have a say in how their jeans look. This makes the final product even more special.
Crafting Dresses And Skirts
Creating your own kids’ clothing is fun and rewarding. You can make unique pieces that your child will love. Dresses and skirts are great projects for beginners. They do not require much fabric and are simple to sew. Let’s explore some easy ideas.
Simple Skirt Patterns
Even if you are new to sewing, you can make a skirt. Simple skirt patterns are easy to follow and quick to complete. Here are some basic steps:
- Choose a fabric. Cotton works well.
- Measure your child’s waist and desired length.
- Cut a rectangle of fabric. The width should be the waist measurement plus 2 inches.
- Hem the bottom edge by folding it over twice and sewing along the fold.
- Sew the two short sides together to form a tube.
- Fold the top edge over to make a waistband. Sew along the bottom of the fold, leaving a small opening.
- Thread elastic through the waistband. Sew the ends of the elastic together and close the opening.
Your simple skirt is ready! Personalize it with ribbons, buttons, or patches.
Upcycling Old Dresses
Upcycling is a great way to give old clothes new life. You can turn an old dress into a cute skirt for your child. Here is how:
| Step | Action |
|---|---|
| 1 | Find an old dress. Check your closet for one you no longer wear. |
| 2 | Cut off the top part of the dress. Leave enough fabric for the skirt length. |
| 3 | Hem the cut edge. Fold it over twice and sew along the fold. |
| 4 | Add elastic to the waistband. Follow the same steps as the simple skirt pattern. |
Your old dress now has a new purpose. Upcycled skirts are eco-friendly and budget-friendly.
Personalized Hoodies And Sweatshirts
Personalized hoodies and sweatshirts are a fun way to add a unique touch to your child’s wardrobe. Kids love wearing something that stands out. Creating custom designs at home is easy and enjoyable. There are different methods to make these clothes special. Two popular techniques include using fabric paint and sew-on appliqués.
Fabric Paint Designs
Fabric paint allows for endless creativity. You can draw anything your child likes. Think of animals, stars, or their name. Fabric paint is available in many colors. You can mix them to create new shades. Use stencils if you want neat, clean shapes. This method is simple and mess-free. It also dries quickly. Once the paint is dry, the hoodie is ready to wear.
Sew-on Appliqués
Sew-on appliqués add texture and charm to hoodies. These are fabric pieces you can sew onto the clothing. Choose fun shapes like hearts, cars, or flowers. You can buy ready-made appliqués or make your own. Cut out shapes from fabric scraps. Then, sew them onto the hoodie. This adds a personal touch. It also makes the hoodie more interesting.
Making Fun Pajamas
Creating fun pajamas for your kids can be an exciting DIY project. It allows you to use your creativity and make bedtime enjoyable. You can choose fabrics that are both cozy and adorable. Let’s explore some ideas to help you get started.
Cozy Fabric Choices
Selecting the right fabric is essential for making comfortable pajamas. Here are some cozy fabric options to consider:
- Flannel: Soft and warm, perfect for cold nights.
- Cotton: Breathable and gentle on the skin.
- Fleece: Excellent for extra warmth.
- Knit: Stretchy and comfortable for kids who move a lot in their sleep.
Each fabric offers unique benefits, so choose one that suits your child’s needs.
Themed Pajama Sets
Themed pajama sets can make bedtime more fun. You can create pajamas based on your child’s favorite characters or interests. Here are some ideas:
- Animal Themes: Use fabric with animal prints or appliqués.
- Superheroes: Create pajamas with their favorite superhero logos.
- Space Adventure: Use star and planet prints for a cosmic look.
- Fairy Tales: Make pajamas with princesses, dragons, or other fairy tale elements.
These themes can make your child’s pajamas special and unique.
With these ideas, you can start making fun and cozy pajamas for your kids. Happy sewing!
Seasonal Outfit Ideas
Creating seasonal outfits for kids can be a fun and rewarding project. Diy clothing ideas allow you to add a personal touch to your child’s wardrobe. You can design unique, stylish, and comfortable outfits for any season. Whether it’s summer or winter, there are many creative possibilities.
Summer Dresses
Summer dresses are perfect for warm, sunny days. Light fabrics like cotton and linen keep your child cool and comfortable. You can create a simple sundress with a basic pattern. Add colorful buttons, ribbons, or patches for extra charm. A sleeveless dress with a flared skirt is easy to sew and ideal for playtime. Consider bright colors and fun prints to capture the summer vibe. You can even recycle old adult shirts into cute summer dresses.
Winter Coats
Winter coats keep your little one warm during chilly months. Choose thick, warm fabrics like wool or fleece. A simple button-down coat with a hood can be both stylish and functional. Add a lining for extra warmth. Use fun, kid-friendly patterns for a cheerful look. You can also add pockets for mittens or small toys. A DIY winter coat can be a practical and unique addition to your child’s winter wardrobe.
Using Fabric Scraps
Using fabric scraps for DIY kids clothing is a fantastic way to recycle. Transforming leftover fabrics into unique clothing pieces brings creativity and fun. Let’s explore some exciting ideas.
Patchwork Projects
Patchwork projects are a wonderful way to use fabric scraps. Create beautiful patterns by sewing small fabric pieces together. This technique can be used for shirts, skirts, and even pants.
| Project | Materials Needed | Steps |
|---|---|---|
| Patchwork Shirt |
|
|
| Patchwork Skirt |
|
|
Accessories From Scraps
Fabric scraps can be used to make adorable accessories. These include headbands, bracelets, and belts. These small projects are quick and easy.
- Headbands: Cut a strip of fabric and tie it in a bow. Simple and stylish.
- Bracelets: Braid three fabric strips together. Add a button for closure.
- Belts: Sew several scraps end-to-end. Add a buckle, and you have a unique belt.
These projects are perfect for beginners. Plus, they make great gifts.
Creating Matching Sets
Creating matching sets for kids’ clothing can be a fun and rewarding project. It’s a wonderful way to bond with your children while creating something special together. Matching sets can bring a sense of unity and style to any family outing or event. They also make for great photo opportunities that you will treasure forever.
Sibling Matching Outfits
Siblings often enjoy dressing alike. It can make them feel closer and more connected. You can start with simple patterns and fabrics that reflect each child’s personality. Consider making matching t-shirts with their favorite characters or designs. Use different colors for each child to keep it interesting while maintaining the matching theme. Another idea is to sew matching dresses or pants with fun prints. This can be a great way to use leftover fabric pieces. You can add small details to personalize each outfit, like buttons or patches.
Parent-child Coordinated Looks
Parent-child coordinated looks are always a hit. They can be subtle or bold, depending on your style. Start by choosing a common theme or color scheme. For example, you could make matching aprons for baking days. Or, create matching pajamas for cozy movie nights. If you enjoy outdoor activities, consider making matching hats or scarves. This can also be a great way to introduce your child to sewing and crafting. Simple projects like these are perfect for beginners. They also allow for lots of creativity and customization. Your child will feel special and proud to wear something you made together.
Decorating With Iron-on Transfers
Decorating kids’ clothing with iron-on transfers is a fun DIY project. It allows for creativity and personalization. It’s also an easy way to revamp old clothes. Children love wearing unique designs that they helped create. Iron-on transfers can transform plain garments into something special.
Choosing Designs
First, decide on the designs you want. Think about what your child likes. Popular choices include animals, superheroes, and favorite cartoon characters. You can find many free designs online. Or, create custom designs with drawing software. Make sure the design fits the clothing size.
Application Tips
Make sure the clothing is clean and dry. Preheat the iron to the temperature recommended. Place the transfer on the fabric where you want it. Cover it with a thin cloth or parchment paper. Press the iron down firmly for the recommended time. Avoid moving the iron around. Let it cool before removing the backing paper. Check the instructions for washing the decorated clothing. Some transfers require special care. Enjoy your new, custom-designed clothes!
Designing Themed Costumes
Designing themed costumes for kids can be a fun and rewarding project. It allows you to create unique outfits that stand out. You can make costumes for different occasions like Halloween or for role-play. This activity can be a great way to bond with your children and ignite their creativity.
Halloween Costumes
Creating DIY Halloween costumes can be a magical experience. Start with simple materials like old clothes and felt. Think about characters your kids love. Superheroes, animals, or fairy tale characters are great choices. Use fabric paint and glue to add details. You can even involve your kids in the process. This makes it more fun and personal.
If you need inspiration, try looking at old pictures. Classic costumes like ghosts or witches never go out of style. Add a personal touch by using items you already have at home. This not only saves money but also makes the costume unique. Your child will love showing off their special outfit.
Role-play Outfits
Role-play outfits can spark your child’s imagination. They can become anything they dream of. A doctor, a pirate, or a princess. Start by making a basic outfit. Use clothes your child already owns. Add accessories like hats, belts, or scarves to complete the look.
For a doctor costume, use a white shirt as a lab coat. Add a toy stethoscope and glasses. A pirate outfit can be made with a striped shirt and a bandana. Add an eye patch and a toy sword for extra flair. Princess dresses can be created using old dresses and adding some sparkle. Use ribbons, glitter, and beads for decoration.
These outfits can provide endless hours of fun. Your child can use them for playdates or school projects. They also make great gifts. Creating these costumes together can be a cherished memory for both of you.
Sewing Basics For Beginners
Starting a DIY kids’ clothing project can be fun and rewarding. It all begins with understanding the sewing basics. Whether you are new to sewing or just need a refresher, getting the right foundation is key. This section will guide you through the essential tools and basic sewing stitches needed to start creating adorable outfits for your little ones.
Essential Tools
To start sewing, you need a few basic tools. First, get a good pair of fabric scissors. They will help you cut fabric cleanly. Next, a measuring tape is crucial for accurate measurements. A seam ripper will help fix mistakes. Don’t forget a set of pins and a pin cushion. They are useful for holding fabric in place.
A sewing machine makes the process faster. But hand sewing can work too. Needles and threads of various sizes and colors are also important. Lastly, an iron and ironing board help to press your fabric. This ensures everything looks neat and professional.
Basic Sewing Stitches
Learning a few basic stitches can get you started on most projects. The running stitch is simple and great for seams. The backstitch is strong and durable, perfect for securing seams. The whip stitch is useful for hemming and joining fabric edges. The zigzag stitch, often done with a machine, is good for stretchy fabrics.
Practice these stitches on scrap fabric first. This helps build confidence. Soon, you’ll be able to create beautiful and functional clothing for your kids. Remember, practice makes perfect. The more you sew, the better you’ll get.
Showcasing Finished Outfits
Once you’ve created some fantastic DIY kids’ clothing, it’s time to showcase the finished outfits! Highlighting your creations not only gives you a sense of accomplishment but also inspires others. Here’s how to present your handmade kids’ clothes in the best light.
Photography Tips
Great photos can make your DIY outfits look even better. Follow these simple tips:
- Natural Light: Take photos in natural light to avoid harsh shadows.
- Simple Background: Use a clean, uncluttered background to make the clothes stand out.
- Angles: Capture different angles to show all the details of the outfit.
- Focus: Ensure your camera is focused on the outfit, not the background.
- Props: Add a few props that complement the outfit but don’t distract from it.
Sharing On Social Media
Sharing your finished outfits on social media is a great way to reach a wider audience. Here’s how to do it effectively:
- Platforms: Choose platforms like Instagram and Pinterest that are visual-focused.
- Captions: Write engaging captions that tell the story behind the outfit.
- Tags: Use relevant tags and keywords to increase visibility.
- Community: Join groups and communities related to DIY kids’ clothing.
- Consistency: Post regularly to keep your audience engaged.
By following these tips, you can showcase your DIY kids’ clothing in the best possible way. Happy crafting!

Credit: www.pinterest.com
Frequently Asked Questions
How Can I Make Simple Diy Kids’ Clothes?
Start with old clothes. Cut and sew to fit your child. Add decorations.
What Materials Do I Need For Diy Kids’ Clothing?
Use old shirts, jeans, fabric scraps, thread, and basic sewing tools.
Are Diy Kids’ Clothes Safe For Children?
Yes, if you use safe materials and check for loose threads or buttons.
Can Beginners Create Diy Kids’ Clothing?
Yes, start with simple projects. Follow online tutorials and practice basic sewing skills.
Conclusion
Creating DIY kids clothing is fun and rewarding. It saves money and lets you add personal touches. Simple projects can bring joy and develop creativity. Try new ideas and see your child’s delight. Start with easy patterns and use colorful fabrics.
Enjoy the process and make lasting memories. You and your child will cherish these handmade clothes. Dive into DIY and discover the joy it brings. Happy crafting!