


Creating a custom T-shirt for kids is a fun and rewarding project. It allows you to design something unique and personal.
Kids love wearing clothes that reflect their personality. A custom T-shirt can showcase their favorite colors, characters, or hobbies. Plus, making one yourself can be a great bonding activity. Whether for a birthday, special event, or just because, a custom T-shirt is a perfect way to show your child how much you care.
In this guide, you’ll learn the steps to create a custom T-shirt that your child will love. From choosing the right materials to adding the final touches, you’ll find everything you need to know right here. Let’s get started on this creative journey!
Materials Needed
Creating a custom t-shirt for kids is a fun and rewarding project. To get started, you need to gather the right materials. This section will cover the essential supplies and some optional add-ons to make your t-shirt unique and special.
Essential Supplies
Here is a list of essential supplies you will need:
- Plain T-Shirt: Choose a high-quality, plain cotton t-shirt in the desired size.
- Fabric Paints or Markers: Use non-toxic, washable fabric paints or markers for safe and easy designs.
- Stencils: Stencils help create consistent and clean patterns. They are great for kids to use.
- Paint Brushes: Various sizes help in detailing and filling larger areas.
- Cardboard Insert: Place inside the t-shirt to prevent paint from bleeding through.
- Painter’s Tape: Use tape to secure the stencil and keep your design in place.
- Iron: Set the paint by ironing the t-shirt after it dries.
Optional Add-ons
Enhance your t-shirt with these optional add-ons:
- Glitter: Add some sparkle to your design with fabric-safe glitter.
- Fabric Glue: Attach small decorations like buttons or patches.
- Sequins: Sew or glue sequins to make the t-shirt shine.
- Rhinestones: Give a bedazzled look with fabric-safe rhinestones.
- Heat Transfer Vinyl (HTV): Create professional-looking designs with HTV and a heat press.
With these materials, you are ready to start creating a unique and personalized t-shirt for kids. Gather your supplies and let your creativity flow!
Choosing The Right T-shirt
Choosing the right t-shirt is the first step in creating a custom t-shirt for kids. It impacts the final look and feel of your design. This section will guide you through selecting the size and best fabric options.
Selecting The Size
Choosing the correct size is crucial. Kids grow quickly, so consider the child’s current size and future growth. Use a sizing chart if available. Measure the child’s chest, waist, and length to find the best fit. Remember, a slightly bigger t-shirt allows for more comfort and longer use.
Best Fabric Options
Fabric choice affects comfort and durability. Cotton is a popular choice. It is soft and breathable. Polyester blends are also good. They are durable and resist wrinkles. Look for fabrics that are easy to wash and maintain. Kids can be messy, so choose something practical.
Design Ideas
Creating a custom t-shirt for kids can be an exciting project. The design is the heart of the t-shirt. It can make it unique and special. Let’s explore some creative design ideas.
Popular Themes
Popular themes are always a hit with kids. Animals are a great choice. Think about cute kittens, playful puppies, or colorful birds. Superheroes are another favorite. Spiderman, Batman, and Wonder Woman can bring a smile to any child’s face. Cartoon characters are also popular. Characters from shows like Peppa Pig or Paw Patrol are loved by many kids.
Personalized Options
Personalized t-shirts make kids feel special. Add their name to the design. Choose their favorite color for the shirt. You can also include their age. For example, “I am 5!” Kids love to see their own drawings on a t-shirt. Scan their artwork and print it on the shirt. This makes the t-shirt truly one-of-a-kind. Another idea is to add a photo. Use a picture from a memorable day. This makes the t-shirt a keepsake.

Credit: www.ashleybrookenicholas.com
Creating The Design
Creating the design for a custom t-shirt for kids can be a fun and rewarding experience. Whether you choose to draw by hand or use digital tools, the process allows you to unleash your creativity. This section will guide you through both methods, helping you create a unique and personalized t-shirt design.
Drawing By Hand
Drawing by hand is a great way to create a custom t-shirt design. Start by gathering your materials. You will need paper, pencils, and markers. Choose a simple design that your child will love. Sketch your design lightly with a pencil first. This allows you to make changes easily. Once you are happy with the sketch, go over it with markers. Use bright colors to make the design pop. Keep the design simple and playful. Kids love bold and easy-to-recognize images. After finishing your design, scan it or take a clear photo.
Using Digital Tools
If you prefer using digital tools, there are many options available. Software like Adobe Illustrator or free programs like GIMP can help you create detailed designs. Start by opening a new file with the dimensions of your t-shirt. Use simple shapes and lines to create your design. Add colors and patterns to make it vibrant. Digital tools offer the advantage of easy editing. You can try different colors and elements without starting over. Once your design is complete, save it in a high-resolution format. This ensures the print quality will be good.
Transferring The Design
Creating a custom t-shirt for kids is a fun and creative activity. After you have the design, the next step is transferring it onto the fabric. This can be done using several techniques, each with its own unique benefits. Let’s explore some popular methods.
Iron-on Transfers
Iron-on transfers are one of the most popular methods for custom t-shirts. This technique is simple and easy to do at home. Here’s a step-by-step guide:
- Print the design onto a transfer paper.
- Cut out the design, leaving a small border.
- Place the design face down on the t-shirt.
- Use a hot iron to press the design onto the fabric.
- Peel off the backing paper while it’s still warm.
This method is great for beginners. It’s quick and requires minimal equipment. Just make sure to use a high-quality transfer paper for the best results.
Screen Printing
Screen printing is another popular method for transferring designs. It’s commonly used for bulk t-shirt production. This technique involves creating a stencil and using it to apply layers of ink to the fabric. Here’s how you can do it:
- Create or purchase a screen with your design.
- Place the screen on the t-shirt.
- Pour ink onto the screen.
- Use a squeegee to spread the ink evenly.
- Lift the screen carefully to reveal the design.
Screen printing gives a professional finish and is durable. It may require more materials and practice but the results are impressive.
| Method | Difficulty | Best For |
|---|---|---|
| Iron-On Transfers | Easy | Beginners, Quick Projects |
| Screen Printing | Moderate | Bulk Orders, Professional Finish |
Both methods have their own advantages. Choose the one that best fits your needs. Happy crafting!
Adding Embellishments
Embellishing a custom t-shirt for kids is a fun way to add personality. With the right tools, the possibilities are endless. Whether using fabric paints or sewing accessories, you can create a unique piece. Let’s explore some creative ways to embellish your t-shirt.
Fabric Paints
Fabric paints are a simple yet effective way to decorate t-shirts. Choose from a wide range of colors and finishes. Here are some tips:
- Use brushes for detailed designs.
- Opt for stencils to create precise shapes.
- Try puffy paints for a 3D effect.
- Mix colors to create unique shades.
Make sure the paint is dry before wearing or washing. This ensures your design lasts longer.
Sewing Accessories
Sewing accessories can add a charming touch to your t-shirt. Here are some ideas:
| Accessory | Usage |
|---|---|
| Buttons | Add them for eyes or other details. |
| Patches | Use iron-on patches for easy application. |
| Ribbons | Sew on the sleeves or hem for a cute finish. |
| Beads | Add them to create sparkly designs. |
You can also use appliqué for more complex designs. Just cut out fabric pieces and sew them onto the t-shirt.
Combining fabric paints and sewing accessories can create a truly unique t-shirt. Have fun and let your creativity shine!
Safety Tips
Creating custom T-shirts for kids can be a fun and creative project. Yet, ensuring their safety is vital. This section focuses on important safety tips that every parent and designer should keep in mind.
Child-friendly Materials
Always choose child-friendly materials for custom T-shirts. These materials should be soft, breathable, and hypoallergenic. Cotton is an excellent choice. It is gentle on the skin and reduces the risk of allergies.
- Look for organic cotton if possible.
- Avoid synthetic fabrics that may cause irritation.
- Ensure the fabric is durable and can withstand multiple washes.
Using safe dyes is equally important. Opt for non-toxic, water-based dyes. These dyes do not contain harmful chemicals and are safe for children’s skin.
Avoiding Choking Hazards
Avoid adding small decorative elements that could pose choking hazards. Buttons, sequins, and beads can be dangerous for young children.
- Use larger, securely attached decorations.
- Ensure no loose threads or parts that can be pulled off.
- Regularly inspect the T-shirt for any wear and tear.
Safety should always be the top priority. Making sure every element on the T-shirt is secure helps prevent accidents.
| Safety Aspect | Tip |
|---|---|
| Material | Choose soft, breathable, and hypoallergenic fabrics. |
| Dyes | Use non-toxic, water-based dyes. |
| Decorations | Avoid small parts and ensure decorations are secure. |
Following these tips ensures the T-shirt is not only stylish but also safe for kids to wear.

Credit: www.amazon.com
Involving The Kids
Creating custom T-shirts for kids can be a fun family activity. Choose designs and colors together. Let children add their personal touch.
Creating custom t-shirts for kids can be a delightful experience. It becomes even more memorable when kids participate in the process. Involving them not only makes the task enjoyable but also fosters their creativity.Age-appropriate Tasks
Assign tasks according to your child’s age. Younger kids can help choose colors and designs. They enjoy picking their favorite characters or patterns. Older kids can try drawing their designs. They can use fabric markers or paint to add their personal touch. This way, every child feels a sense of ownership and pride.Making It A Fun Activity
Turn the t-shirt making into a fun activity. Play some music in the background. Set up a comfortable workspace with all the needed materials. Encourage kids to share their ideas. Celebrate their creativity. Praise their efforts. This makes the process exciting and rewarding for them. Let them show off their creations. Plan a small fashion show at home. Kids love to showcase their work. This will make the activity even more memorable for them. “`Washing And Care
Taking care of a custom t-shirt for kids ensures it lasts longer and remains vibrant. Proper washing and care techniques are essential to maintain the design and fabric. Follow these steps for the best results.
First Wash Instructions
Use cold water for the first wash. This helps prevent colors from bleeding. Turn the shirt inside out to protect the design. Use a mild detergent without bleach. Avoid washing with other clothes that have zippers or buttons. These can damage the shirt. Choose a gentle cycle on your washing machine. Dry the shirt on a low heat setting or air dry it.
Long-term Maintenance
Continue washing the shirt inside out. This reduces wear on the design. Use cold water and a mild detergent. Avoid bleach and fabric softeners. They can fade colors and weaken the fabric. Dry the shirt on low heat or air dry it. High heat can damage the design. Iron the shirt inside out on a low setting if needed. Store the shirt in a cool, dry place. Avoid direct sunlight, which can fade colors.
Showcasing The T-shirt
Showcasing your custom t-shirt for kids is an exciting step. It’s time to display your creative work. This can also inspire others to create their own designs. Here are some ways to showcase your custom t-shirt effectively.
Photo Ideas
Capturing the perfect photo of your custom t-shirt is essential. Make sure the lighting is good. Natural light works best. Here are some ideas:
- Flat Lay: Lay the t-shirt on a clean surface. Arrange some props around it.
- Action Shots: Take a photo of a child wearing the t-shirt. Capture them playing or laughing.
- Close-Ups: Focus on the design details. Show the quality of the print.
Sharing On Social Media
Social media is a great platform to showcase your work. Here are some tips:
- Choose the Right Platform: Post on Instagram and Facebook. These are popular for visual content.
- Use Engaging Captions: Write a short, catchy caption. Ask a question to encourage interaction.
- Tag Relevant Accounts: Tag accounts related to kids’ fashion. This can increase your reach.
Sharing your custom t-shirt on social media can attract a lot of attention. It’s a great way to connect with others who share your interests.
Common Mistakes
Making a custom t-shirt for kids can be fun and rewarding. But, many people make mistakes that can ruin their project. Avoiding these common mistakes can help you create a perfect t-shirt for your child. Below are some frequent errors and tips to avoid them.
Design Flaws
Design flaws can ruin a good t-shirt. One common mistake is using too many colors. Kids’ t-shirts should have simple and bright designs. Overcrowded designs can make the shirt look messy. Use a few colors and clear images to make the design pop.
Another issue is poorly sized graphics. Ensure the design fits well on the t-shirt. Too large or too small designs can look awkward. Measure the area where the design will go. This way, you can size your design correctly.
Lastly, avoid complicated fonts. Kids’ shirts look better with easy-to-read fonts. Fancy fonts may look nice but can be hard to read. Simple fonts ensure the message is clear and readable.
Material Issues
Choosing the wrong material can lead to problems. Cotton is a popular choice for kids’ t-shirts. It is soft, breathable, and comfortable. Avoid using synthetic fabrics. They can cause skin irritation and are less comfortable.
Shrinkage is another issue. Always pre-wash the fabric before printing. This step prevents the design from warping after washing. Use high-quality fabric to reduce shrinkage.
Check for fabric weight as well. Lightweight fabric is suitable for summer. Heavier fabric works better for cooler weather. Choose the right fabric weight based on the season and activity.
| Common Mistakes | Solution |
|---|---|
| Too many colors | Use 2-3 bright colors |
| Overcrowded designs | Keep designs simple |
| Poorly sized graphics | Measure design area |
| Complicated fonts | Use easy-to-read fonts |
| Wrong material | Choose cotton |
| Shrinkage | Pre-wash fabric |
| Wrong fabric weight | Select based on season |
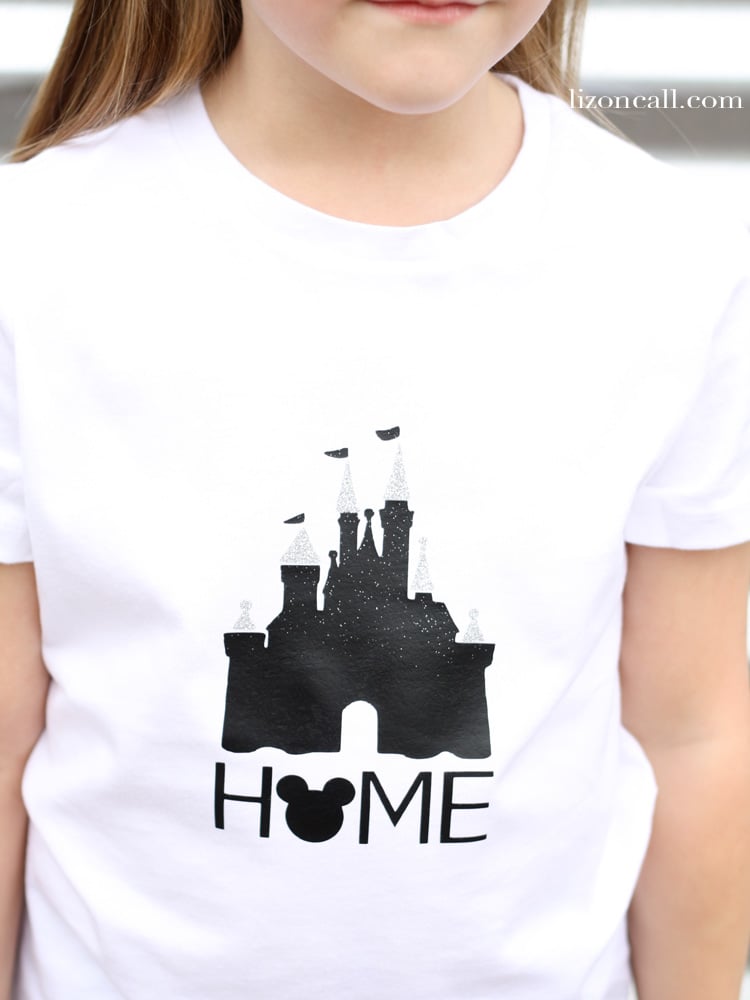
Credit: lizoncall.com
Frequently Asked Questions
How Do I Choose The Right Fabric For Kids’ T-shirts?
Choose soft, breathable fabrics like cotton. They are comfortable and gentle on kids’ skin.
What Design Ideas Are Popular For Kids’ Custom T-shirts?
Popular designs include cartoons, animals, and favorite characters. Bright colors and fun prints are a hit.
Can I Use Fabric Markers For Custom T-shirt Designs?
Yes, fabric markers are great for drawing unique designs. They are easy to use and safe for kids.
How Do I Ensure The T-shirt Fits My Child Well?
Measure your child’s chest, waist, and length. Compare with size charts to pick the best fit.
Conclusion
Creating custom t-shirts for kids can be a fun project. It allows for creativity and personalization. Follow the simple steps we’ve outlined. You’ll have a unique shirt in no time. Remember to choose safe, kid-friendly materials. Involve your child in the process for extra fun.
Enjoy the bonding time and the end result. Custom t-shirts make great gifts too. Start your project today. Happy designing!


