

Making your own kids’ clothes can be a rewarding experience. It allows for creativity and personalization.
Plus, it’s a cost-effective way to dress your children. In this blog, we’ll explore the steps to create unique, handmade clothing for your kids. Whether you’re a beginner or have some sewing experience, you’ll find useful tips and tricks here.
Imagine the joy of seeing your little ones in clothes crafted by you. Handmade clothes can be tailored to fit perfectly and designed to match your child’s personality. Get ready to dive into the world of DIY fashion for kids. It’s simpler than you might think and incredibly satisfying. Let’s get started on this creative journey together!
Introduction To Diy Kids Clothes
Creating your own kids’ clothes can be a fun and rewarding experience. Learn simple sewing techniques to make unique and personalized outfits for your little ones. Save money and customize designs to suit their style and comfort.
Making clothes for your kids can be a fun and rewarding experience. You get to choose the fabric, style, and details. Plus, your children will have unique clothes that no one else has. DIY kids clothes can be a great way to express creativity and save money.Why Diy?
Creating clothes for your kids is a special way to show your love. It allows you to make something truly unique. You can pick colors and patterns that your kids love. Also, making clothes can be a relaxing and enjoyable hobby.Benefits Of Homemade Clothes
Homemade clothes can be more durable than store-bought clothes. You can choose high-quality fabrics that last longer. This means fewer tears and rips. Kids outgrow clothes quickly, so making your own can save money. You can also adjust the size as needed. Personalized clothes can make your kids feel special. They get to wear something made just for them. This can boost their confidence and make them feel unique. Additionally, you can ensure the clothes are comfortable and fit well. Homemade clothes can be more eco-friendly. You can use sustainable fabrics and reduce waste. This is better for the planet and teaches kids about sustainability. You can even reuse old clothes and turn them into something new. Making your own kids clothes can be a bonding experience. You can involve your children in the process. They can help choose fabrics and designs. This can be a fun activity to do together and create lasting memories. “`Choosing The Right Fabric
Choosing the right fabric is crucial for making your own kids’ clothes. The fabric’s texture, durability, and ease of care can make or break the final product. Here, we will guide you through the best fabric options for creating comfortable and stylish kids’ clothing.
Fabric Types
Understanding different fabric types is the first step. Here are some common options:
- Cotton: Soft, breathable, and easy to wash.
- Jersey Knit: Stretchy and comfortable. Great for active kids.
- Fleece: Warm and cozy for colder weather.
- Denim: Durable and sturdy. Ideal for pants and jackets.
- Linen: Lightweight and breathable. Perfect for summer clothes.
Kid-friendly Materials
Not all fabrics are suitable for children. Here are some materials that are kid-friendly:
| Material | Benefits |
|---|---|
| Organic Cotton | Free from chemicals, safe for sensitive skin. |
| Bamboo Fabric | Hypoallergenic and eco-friendly. |
| Modal | Soft, breathable, and moisture-wicking. |
| Wool | Natural, warm, and moisture-resistant. |
Choosing these materials ensures your child’s comfort and safety. Always consider the fabric’s feel and durability. Kids are active and need clothes that can keep up.
Essential Sewing Tools
Creating your own kids’ clothes can be a fun and rewarding project. To get started, you’ll need some essential sewing tools. These tools will make your sewing process smoother and more efficient. In this section, we’ll cover both basic and advanced tools that will help you in your journey.
Basic Tools
First, let’s look at the basic tools you need:
- Sewing Machine: A reliable sewing machine is a must-have. It will save you time and effort.
- Needles: Keep a variety of needles on hand. Different fabrics require different types of needles.
- Thread: Use high-quality thread. It prevents breakage and ensures durability.
- Scissors: Invest in a good pair of fabric scissors. They provide clean cuts and prevent fraying.
- Measuring Tape: Accurate measurements are crucial for well-fitting clothes. A measuring tape helps with this.
- Pins and Pincushion: Pins hold fabric pieces together while you sew. A pincushion keeps your pins organized.
- Seam Ripper: Mistakes happen. A seam ripper helps you remove stitches easily.
Advanced Tools
Once you are comfortable with the basics, consider adding these advanced tools:
- Serger: A serger finishes edges and seams professionally. It also trims excess fabric.
- Rotary Cutter and Mat: These tools are great for cutting straight lines and large pieces of fabric.
- Pattern Weights: Use pattern weights instead of pins. They hold patterns in place without damaging the fabric.
- Tailor’s Chalk: Mark your fabric accurately with tailor’s chalk. It is easy to remove and doesn’t stain.
- Bias Tape Maker: Create your own bias tape. This tool makes it quick and easy.
- Embroidery Hoop: Add decorative elements to your kids’ clothes with embroidery. An embroidery hoop keeps your fabric taut.
Using the right tools can make a big difference in your sewing projects. Equip your sewing kit with these essential tools and start creating beautiful clothes for your kids.
Credit: africa-ird.org
Taking Accurate Measurements
Taking accurate measurements is essential when making kids’ clothes. It ensures a perfect fit and avoids wasted materials. This section will guide you on how to measure your child correctly and offer some useful tips.
How To Measure
Start with a measuring tape. Make sure your child stands still. It’s best to measure over light clothing for accuracy. Measure the chest by wrapping the tape around the widest part. Keep the tape snug but not tight.
Next, measure the waist. Find the natural waistline, usually just above the belly button. Wrap the tape around this area. Again, keep it snug but not too tight. Record this number.
For the hips, wrap the tape around the fullest part of the hips. Ensure your child is standing straight. Write down this measurement. Finally, measure the inseam. This is the length from the crotch to the ankle. Make sure the tape is straight for an accurate measurement.
Measurement Tips
Always measure twice to ensure accuracy. It helps to write down each measurement as you go. Use a flexible, soft measuring tape for comfort. Avoid pulling the tape too tight.
Have your child stand naturally, with feet together. This gives the best results. If your child is wiggly, try making it a game. This can help them stay still.
Make sure the tape is level around the body. This prevents incorrect measurements. Take all measurements at the start. This saves time later. Happy measuring!
Creating Patterns
Making your own kids’ clothes can be fun and rewarding. One key step is creating patterns. Patterns are templates that help you cut fabric pieces accurately. This section will guide you through the basics and how to customize them.
Pattern Basics
Patterns are essential for sewing. They come in various forms, including paper patterns and digital downloads. Here are the basic steps to create a pattern:
- Take Measurements: Measure your child’s chest, waist, hips, and height.
- Choose a Pattern Type: Decide if you want to use a commercial pattern or draft your own.
- Draft the Pattern: Use your measurements to draw the pattern on paper. Ensure to add seam allowances.
- Cut the Pattern: Cut the paper pattern pieces accurately.
Using the right tools is crucial. A measuring tape, ruler, and pattern paper are your best friends. Precision is key to ensure a good fit.
Customizing Patterns
Once you have the basic pattern, you can customize it. Adding your personal touch makes the clothes unique.
Here are some ways to customize patterns:
- Adjust Length: Modify the length of sleeves, pants, or skirts to suit your child’s style.
- Add Pockets: Include pockets for functionality and design.
- Change Necklines: Experiment with different necklines to add variety.
- Combine Patterns: Mix and match elements from different patterns.
Customizing patterns allows you to be creative. It’s the step where you can add unique details that reflect your child’s personality.
Remember, practice makes perfect. The more you experiment, the better you will get at creating and customizing patterns.
Cutting The Fabric
Cutting the fabric is a crucial step in making kids’ clothes. Proper cutting ensures the pieces fit together perfectly. It also minimizes fabric waste. Let’s dive into the best practices for cutting fabric.
Cutting Techniques
Use sharp scissors to cut the fabric. Blunt scissors can damage the fabric. Lay the fabric flat on a clean surface. Pin the pattern pieces to the fabric. This keeps them in place while cutting. Cut along the edge of the pattern carefully. Make smooth, even cuts. Avoid jagged edges.
Safety Tips
Always supervise children around scissors. Store scissors out of reach when not in use. Keep your fingers away from the cutting path. Use a rotary cutter for straight lines. It is safer and faster. Wear a thimble to protect your fingers. If you’re using pins, keep them in a pin cushion. This prevents accidental pricks.
Sewing Basics
Sewing basics are the building blocks for creating your own kids’ clothes. Understanding these fundamentals will help you sew with confidence. Let’s explore some essential sewing techniques and tips.
Basic Stitches
Learning basic stitches is crucial for any sewing project. The running stitch is a simple and versatile stitch. Use it for seams and gathering fabric. The backstitch is strong and perfect for seams that need durability. Another useful stitch is the whipstitch, ideal for sewing hems and closing seams. Practice these stitches on scrap fabric before starting your project.
Sewing Machine Tips
A sewing machine makes sewing faster and easier. First, learn how to thread your machine correctly. Incorrect threading can cause problems. Adjust the tension settings for different fabrics. Too tight or too loose tension affects the stitch quality. Use the right needle for the fabric you are sewing. A universal needle works for most fabrics. For thicker fabrics, use a heavier needle. Keep your machine clean and oiled for smooth operation. Follow the manual for maintenance tips.

Credit: www.pinterest.com
Adding Embellishments
Creating your own kids’ clothes is both fun and rewarding. Adding embellishments can make each piece unique and special. You can use a variety of techniques to enhance the look and feel of your handmade clothes.
Decorative Elements
Adding decorative elements can turn simple clothes into something special. Here are a few ideas:
- Buttons: Use colorful buttons to add charm. Try different shapes and sizes for a playful look.
- Ribbons: Sew ribbons along hems or use them as ties. They can add a touch of elegance.
- Lace: Incorporate lace trims on sleeves or necklines. It gives a vintage appeal.
- Patches: Iron-on or sew cute patches. They are great for covering small stains or holes.
Personalization Ideas
Personalizing kids’ clothes makes them feel extra special. Here are some creative ideas:
| Method | Description |
|---|---|
| Embroidery | Stitch their name or initials. You can also add small designs like stars or hearts. |
| Fabric Paints | Use fabric paints to create custom designs. Let your child help for extra fun. |
| Appliqué | Sew on fabric shapes like animals or flowers. It adds a three-dimensional effect. |
| Iron-On Transfers | Print designs on transfer paper. Iron them onto the fabric for an easy decoration. |
Personal touches make clothes one-of-a-kind. Kids will love wearing something made just for them.
Finishing Touches
The final steps of making your own kids’ clothes involve adding finishing touches. These steps ensure the clothes look polished and professional. Taking time with these details makes a big difference. Let’s explore some key finishing touches: hemming and final adjustments.
Hemming
Hemming is a crucial step in finishing clothes. It prevents fabric from fraying and gives a neat edge. Here’s a simple method to hem your kids’ clothes:
- Fold the fabric edge up by half an inch.
- Press it with an iron to set the fold.
- Fold it up again by another half inch.
- Press it once more for a clean edge.
- Sew along the fold using a matching thread.
This process is easy but makes the clothes look professionally made. A neat hem can elevate the appearance of any garment.
Final Adjustments
Final adjustments ensure the clothes fit well and are comfortable. Consider these steps:
- Check the seams for any loose threads.
- Trim any excess fabric.
- Ensure buttons and zippers are secure.
- Try the clothes on your child for fit.
- Make small tweaks to improve comfort.
These adjustments make a big difference in how the clothes feel. A well-fitted garment is more comfortable for your child. Taking time with these details ensures a polished final product.
Common Mistakes To Avoid
Making kids’ clothes can be fun and rewarding. But, it comes with challenges. Avoiding common mistakes ensures your projects look professional and last longer. Let’s explore some typical errors and how to prevent them.
Sewing Errors
Sewing mistakes can ruin your project. Here are some common errors:
- Skipping the pattern instructions. Always read them carefully.
- Using the wrong needle size. Match the needle to your fabric.
- Ignoring seam allowances. They are crucial for a proper fit.
To avoid these errors, follow these tips:
- Read the instructions before starting.
- Choose the right needle size for your fabric.
- Measure and mark your seam allowances.
Fabric Issues
Selecting the right fabric is key. Common fabric mistakes include:
- Choosing the wrong type of fabric. Some fabrics are harder to work with.
- Not pre-washing the fabric. This can lead to shrinkage later.
- Using fabric with too much stretch. It can make sewing difficult.
To avoid these issues, consider the following:
| Fabric Issue | Solution |
|---|---|
| Wrong type of fabric | Choose fabric suitable for kids’ clothes, like cotton. |
| Not pre-washing | Always pre-wash to prevent shrinkage. |
| Too much stretch | Use fabrics with minimal stretch. |
Project Ideas
Creating your own kids’ clothes can be both fun and rewarding. You can make unique pieces that fit perfectly and showcase your creativity. Here are some project ideas to get you started, ranging from simple to more advanced projects.
Simple Projects
Simple projects are great for beginners. They don’t require advanced skills or special tools. You can complete these projects quickly and with minimal frustration.
- Basic T-Shirt: A basic t-shirt is a great starter project. Use a soft fabric and a simple pattern. You can customize it with patches or fabric paint.
- Elastic Waist Pants: Elastic waist pants are comfortable and easy to make. You just need fabric, elastic, and a basic sewing machine.
- Bandana Bibs: Perfect for babies, bandana bibs are both stylish and practical. Use soft, absorbent fabric and basic sewing skills.
Advanced Projects
Advanced projects require more skill and time. They often involve more complex techniques and patterns. These projects are perfect for those looking to challenge themselves.
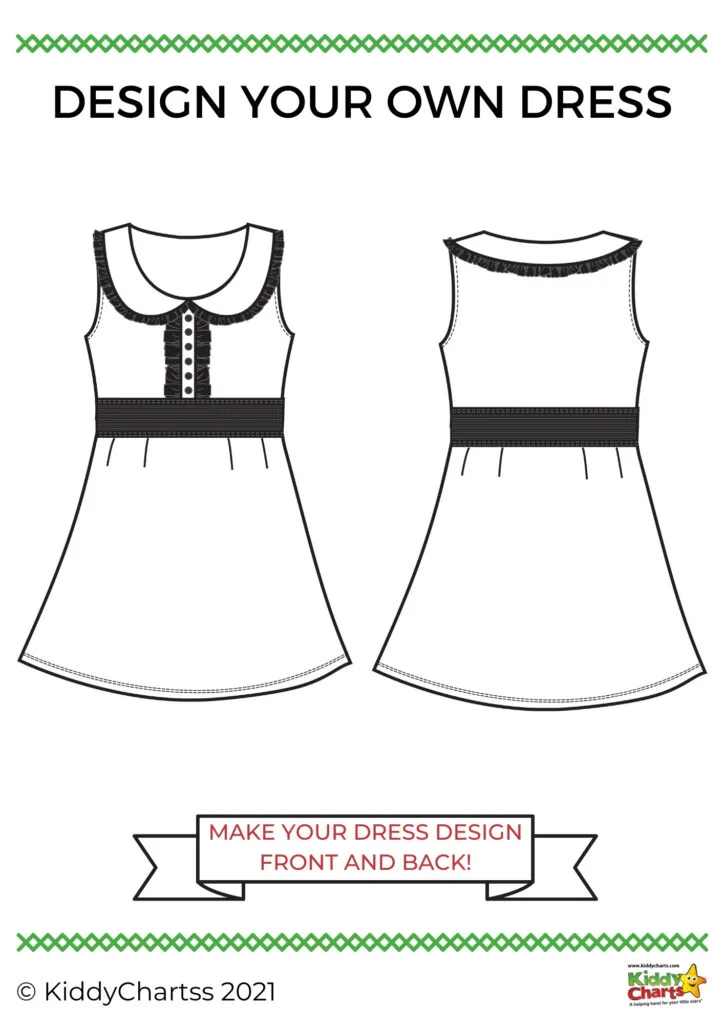
- Dresses: Making a dress involves more steps and precision. Choose a pattern with detailed instructions. Use quality fabric for the best results.
- Jackets: Jackets are more complex due to linings and closures. This project is great for developing your sewing skills.
- Overalls: Overalls require careful cutting and stitching. Pay attention to details for a professional finish.
Whether you choose simple or advanced projects, making your own kids’ clothes can be a fun and fulfilling experience. Start with easy projects and gradually move to more complex ones. Happy sewing!

Credit: www.youtube.com
Caring For Homemade Clothes
Making clothes for your kids is a rewarding experience. It’s fun and adds a personal touch to their wardrobe. But homemade clothes need special care to last longer. Let’s explore some tips for washing and storing these handmade treasures.
Washing Tips
Use gentle detergent for homemade clothes. Harsh chemicals can ruin delicate fabrics. Wash them in cold water. This prevents colors from fading. Avoid using bleach. It can weaken the material. Turn clothes inside out before washing. This keeps the fabric looking new. Hand wash if possible. It’s the safest method for delicate items. Air dry clothes instead of using a dryer. Heat can damage the fabric and cause shrinkage.
Storage Solutions
Store homemade clothes in a cool, dry place. Avoid direct sunlight. It can fade the colors. Use padded hangers for delicate dresses. They help maintain the shape. Fold heavier items like sweaters. This prevents them from stretching. Store items in breathable containers. Plastic can trap moisture and cause mildew. Use cedar blocks or lavender sachets. They keep pests away and add a pleasant scent.
Conclusion And Encouragement
Creating your own kids’ clothes can be a fun and rewarding experience. It allows you to choose the best materials, designs, and styles for your child. Plus, it can save you money and provide a unique wardrobe that stands out. If you are just starting, remember to be patient with yourself. Mistakes are part of the learning process. With time and practice, you will improve and gain confidence.
Final Thoughts
Sewing your child’s clothes offers many benefits. It gives you control over the fabric quality and design. You can tailor the clothes to fit perfectly. Handmade clothes also hold sentimental value. They often become cherished keepsakes. Don’t worry about making mistakes. Each one is a learning opportunity. Enjoy the process and celebrate your progress.
Next Steps
Ready to start making your own kids’ clothes? Here are a few steps to guide you:
- Research: Look for patterns and tutorials online. There are many free resources available.
- Gather Materials: Purchase or repurpose fabrics. Gather necessary tools like scissors, needles, and thread.
- Start Simple: Begin with easy projects. A basic dress or pair of pants is a good start.
- Practice: Spend time sewing regularly. This will help you improve your skills.
- Join a Community: Find online groups or local classes. Connecting with others can provide support and inspiration.
Remember, the journey is as important as the destination. Enjoy each step and celebrate your achievements.
Frequently Asked Questions
What Materials Do I Need To Make Kids Clothes?
You need fabric, thread, needles, scissors, and a sewing machine. Basic tools for sewing.
How Do I Choose The Right Fabric For Kids Clothes?
Choose soft, breathable fabric like cotton. Ensure it’s comfortable and safe for kids’ sensitive skin.
Can Beginners Make Kids Clothes At Home?
Yes, beginners can make simple clothes. Start with easy patterns and practice basic sewing techniques.
Where Can I Find Patterns For Kids Clothes?
Find patterns online, in sewing books, or at fabric stores. Many offer free or inexpensive options.
Conclusion
Creating your own kids’ clothes is rewarding and fun. It allows you to design unique pieces. Plus, it saves money. You can use various patterns and fabrics. Start small and gradually improve your skills. Your children will love their custom-made outfits.
Enjoy the process and cherish the results. Happy sewing!